Aug 27 2012
A drawing explained – Harvard Museum of Natural History
My friend Theo asked me to go out and draw with her sometime and try to teach her how I sketch from life. That seemed like a bit of a tall order, but I was very willing to give it a shot, and I think it actually worked fairly well. I should mention that Theo does have quite a bit of art experience already, so we weren’t starting from scratch.
So anyway, we walked over to Harvard and found a spot to sit and draw. This piece took about 40 minutes, with a few breaks to explain things. Since some of my readers may be interested in this topic, I will attempt to capture some of what I told Theo, and walk through the process of how I choose a composition and do a drawing from life.
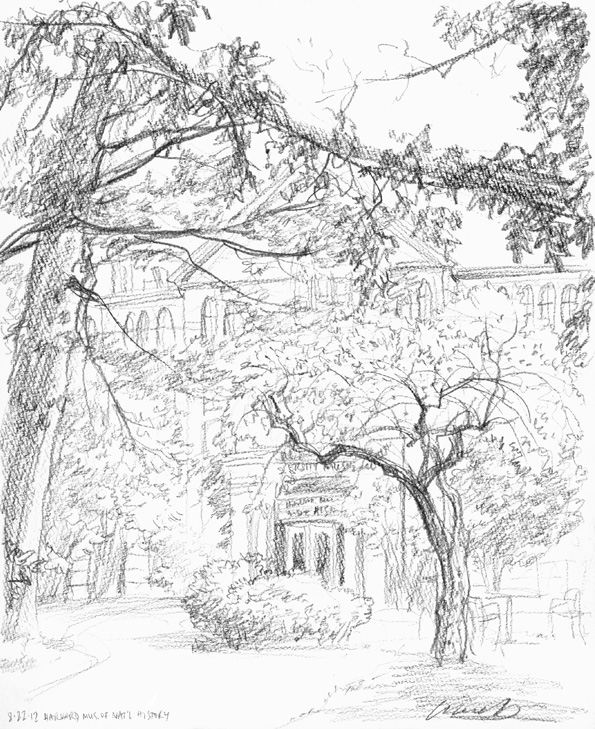
First I look around for something interesting to draw. For me, that often means an interesting overlapping or framing of shapes. In this case Theo pointed out a tree she liked, and I found a distance and angle from which that tree (The small one) was framed by two larger trees, with the entrance of the Natural History Museum behind it.
I often start out with a quick “thumbnail” composition, to figure out the framing and the main elements I’m interested in. In this case you can see I’m emphasizing the curve of the small tree, the trunk of the pine on the left, and the large branch of the oak coming in from the right, and you can see how I tried both horizontal and vertical framing.
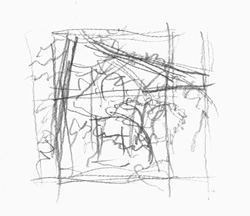
At this point Theo did a thumbnail which she didn’t like, and I encouraged her to work over it with a different, heavier tool. One way to think of an artwork is as a record of a process, and leaving the mistakes there often makes it much more interesting.
Next I transfer the rough composition to the larger size of the “real” drawing (unless I have skipped the thumbnail step). These are Theo’s photos (thanks Theo!).
Then I start to add some values and details. Because life sketching usually needs to be done quickly (whether because of changing light, need to eat, other time constraints, or just to stay loose), I try to find some quick, scribbly marks that represent the different types of leaves for each tree.
I deliberately experiment a bit here, because sometimes the first/automatic marks I make are something habitual that doesn’t really reflect what I’m seeing. This will be especially true if you are a beginner or haven’t drawn for a while — you might revert to some canonical leaf/tree shape you have in your head, ignoring what’s really there. It still happens to us professionals too.
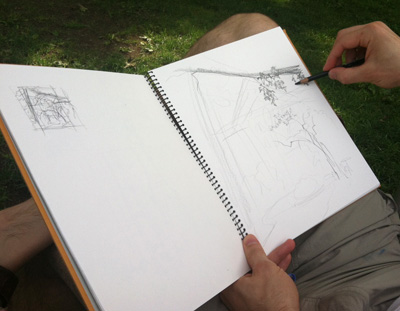
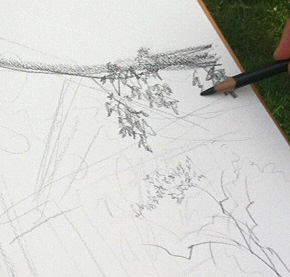
Here’s a closeup showing the scribbly oak leaves and the much smaller/lighter leaves on the small tree below it. Note that for some of the closer oak leaves, I’m drawing (roughly) their actual shape. Having a few examples lets the viewer extrapolate to figure out what the other leaves on that tree would look like.
Theo was writing down my comments while I talked so she didn’t get another photo until I was pretty well along. I’m trying to work the whole picture plane without obsessing about any small areas of it, keeping the marks loose but based on observation. That’s important! By the way, that’s a Cretacolor Nero (medium) pencil I’m working with, on a Holbein multi-drawing sketchbook.
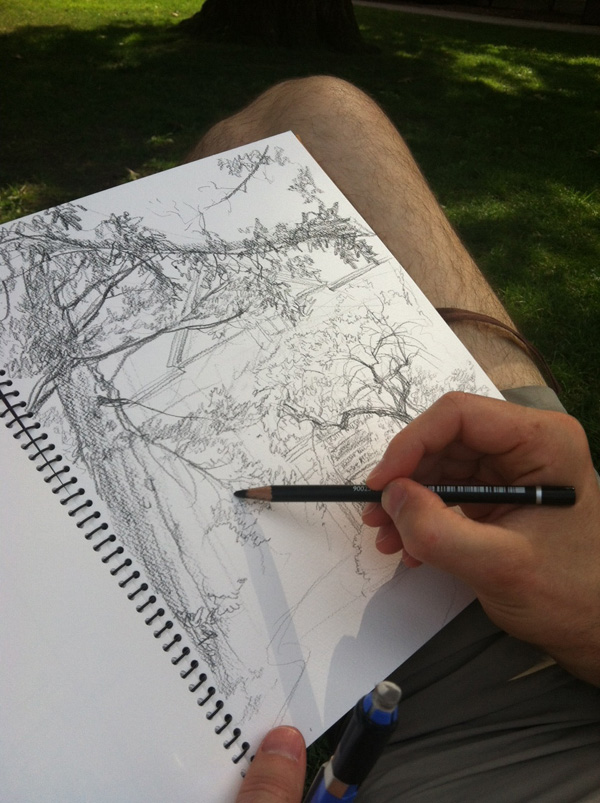
Here’s the finished drawing at the point where I chose to leave it. I could of course add/refine more details, but this basically captures what I was after, and if I worked it further it might lose some of its freshness.
Hope that was useful. I’m happy to answer questions in the comments.
One Response to “A drawing explained – Harvard Museum of Natural History”

These little glimpses into your process are way fun to see. 🙂